Monday, July 31, 2006

We are not as crazy as you may think....


One comment that often comes up regarding our "little" project is that it is off the charts or that we are crazy. This has been feeling more the case lately. This morning as I was drinking my first cup of coffee and trying to wake up to another work week at the office as my feet hurt and my back aches I ran across another project that puts us back on the charts.

Thomas has been working on his place in Kentucky for two years and it is incredible. Almost all the wood is from his property and it looks to be a huge undertaking. His blog is http://massiehouse.blogspot.com/ and well worth checking out.

Friday, July 28, 2006

Weekend to-do list

Now that our current house is on the market we are full speed ahead on Boothe Mountain Retreat. Here is what is on tap.

1. Take lots of pictures of the exterior with the siding going up.
2. Finish placing the board and batten siding on the porch side.
3. Cut about 16 poplar logs into 3/4 inch random width boards for the siding
4. Cut the mill off cuts into 2" battens for the siding
5. Stain all sides of the siding boards before putting them up on the house
6. Do the final pressure test on the house drain lines
7. Set the outside service panel and breaker box on the inside (Glenn's job)
8 Drive two 8 ft ground rods into the ground (Coleman's job)
9. Take some interior photos of the new floors for Aaron

Tool Review: Sony Cyber-shot digital camera


One of the most important tools of the home improvement warrior and house blogger is the digital camera. We had been using a 4 mega pixel Canon PowerShot G2 that we purchased used from a neighbor for the past 2 years. It has been a great camera until a few days ago. While out at the home site placing putting up the siding on the house the camera got ruined. I set it down with my water bottle on a canvas chair. The water proceeded to run out of the bottle and it created a nice pool for the camera to swim in. The only problem is that the camera is not waterproof and does not know how to swim.

The new camera (Sony Cyber-shot DSC-S600) is a lot smaller, better image quality, larger memory. This camera is a 6 mega pixel vs a 4. While it has a Zeiss lens, I am not sure that the lens is better than the old camera. My main worry about the camera is that it is so small that it will be very easy to get your fingers in front of the lens or flash. The old one had an internal rechargeable battery and RCA jacks+ USB. The new one uses AA's and only has the USB out. So that is a down side of not being able to review the photos on the spot at any TV. The old camera was $300 used and the new one was $199 new at Targets and even less expensive using the 10% off certificate that we had.

Watch out for lots of new pictures from this weekend!

Tuesday, July 25, 2006

The Real DIY Flooring : Part 2 (with pictures)


In 
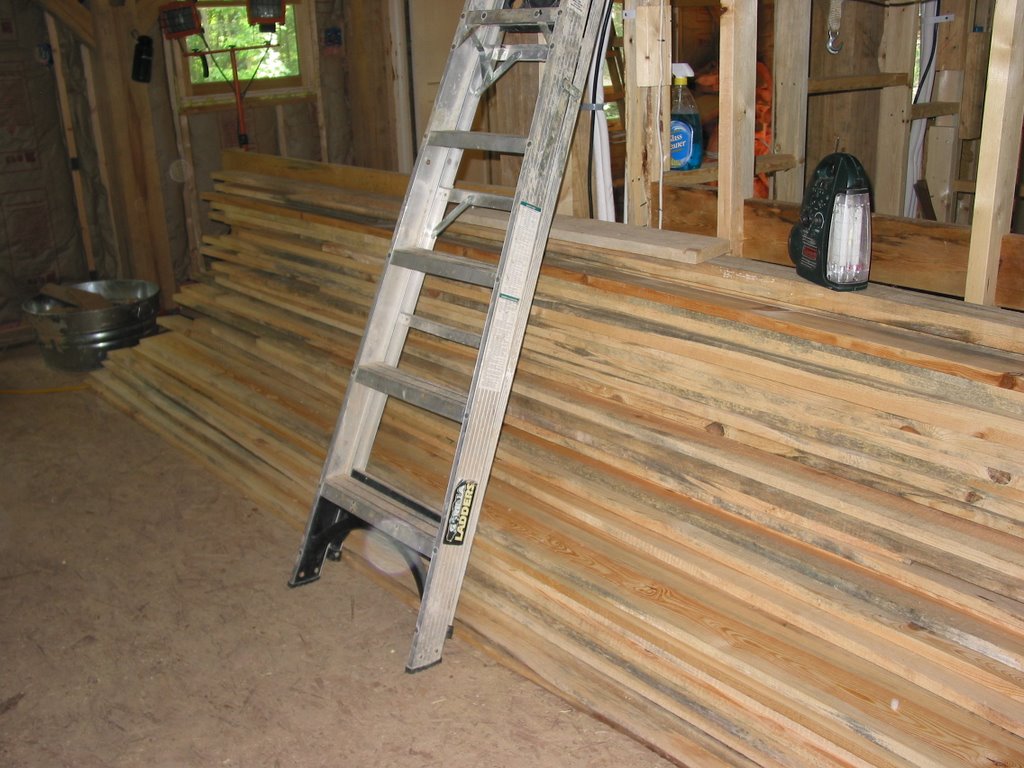
part one of "The Real DIY Flooring" we left off with the rough sawn 1x4 and 1x6 boards dry and in the house to acclimate while I was out of town.

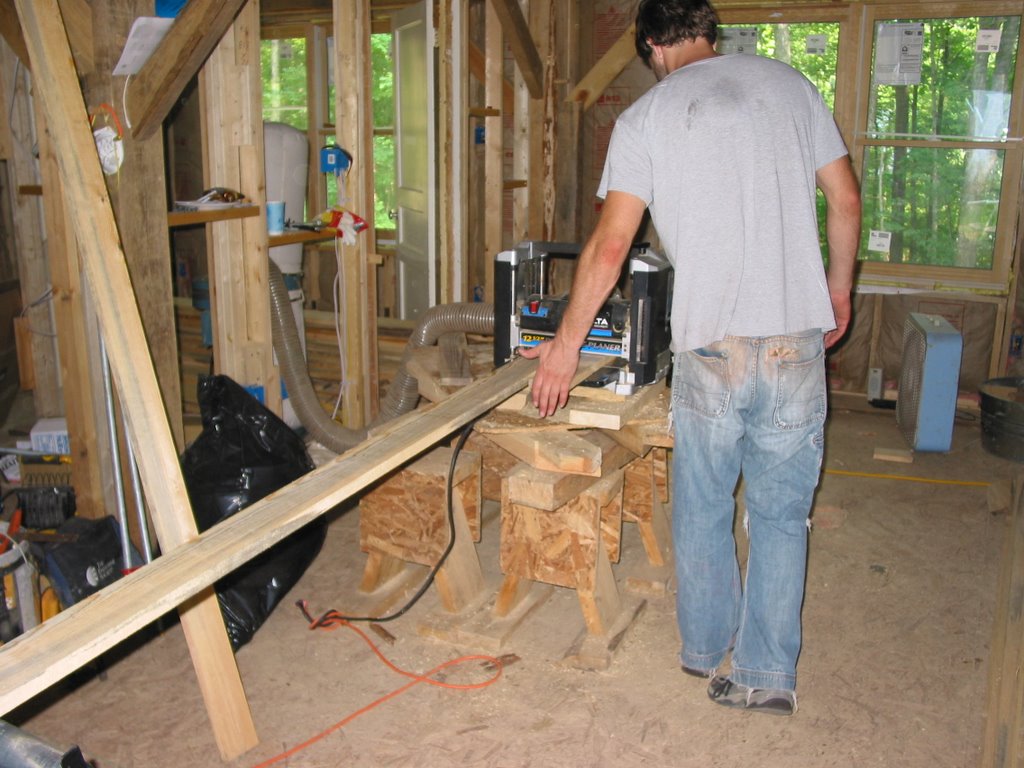
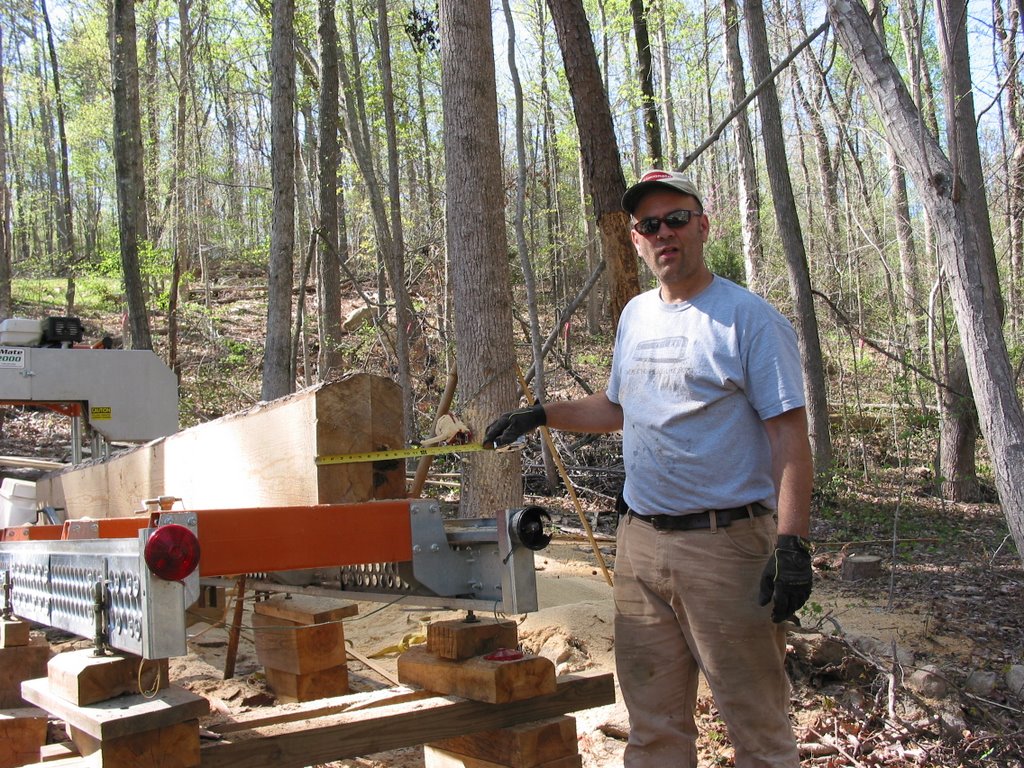
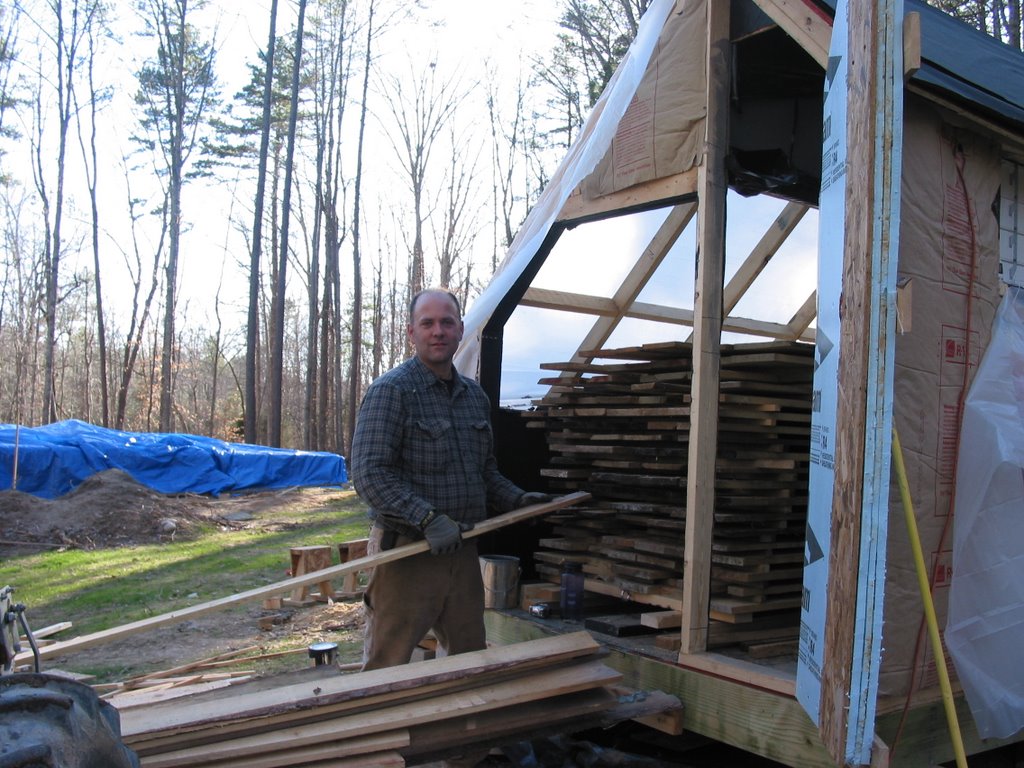
While gone Coleman was set up to plane all the boards to 7/8ths of an inch. The set up was pretty basic with a Delta 12 1/2 inch planer attached to a dust collector. The dust collector is essential since it pulls all the chips from the planer but it fills up after about 12 boards are passed through it. An in-feed and out-feed roller was set up so while one board was going through the next could be picked out and started. It can easily turn into a scene from Laverne and Shirley on the bottling line when things get out of control ...

......get the first board going ... watch it ... select the next ... start it going towards the end of the previous one ... watch the one coming off ... stack the boards ... select the next board ... check thickness using the caliper.....

When I got back it was great to see all the boards planed and sorted by size. Coleman did a great job! There was a small reject pile of twisted and thin boards but all in all they were great. 
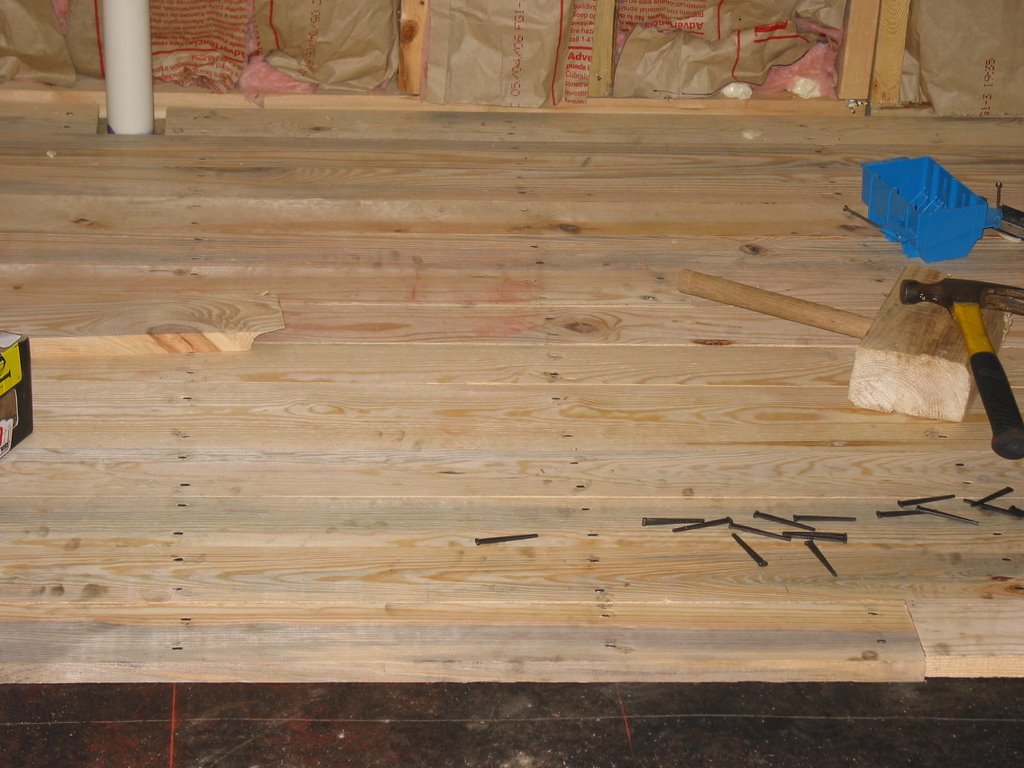
So from tree to floor you are talking about 50 to 100 ft of travel!

Next step in the process was to nail the boards down. We are face nailing the boards with old time looking cut nails. 2 1/2" nails over floor joists and 1 1/2 " nails when board ends meet not over a joist. Each board gets 2 nails every 16 ". That is a lot of nailing and a lot of sore thumbs. One trick we used was needle nose pliers to hold the 1 1/2" nails to protect against injured thumbs. We ended up driving lots of nails.

To help eliminate squeaky floors we placed 15 lb tar paper on the subfloor (3/4 " T&G OSB glued and nailed to the joists) and snapped chalk lines where the joists were. We also used pipe clamps to put the boards tight. They still have a bit of moisture in them so they will shrink instead of expand. I found that the best way to put the boards down was to cut 3 to 4 rows and set them in place then clamp and nail. If Coleman was working with me I would get the boards placed and 1/2 the nails in and then he could fill in nail later.

The final step for now was to cover the floors with rosen paper to protect them while we finish the remainder of the interior. We are going to oil them once we are just about done with the house. You may wonder why we are doing the floors before the drywall etc. Given that the radiant tubing is under the floors we wanted to be able to check the tubing if there were any nails that missed the floor joists and hit the tubes. We are happy to report that tubes are unharmed and still under pressure.

To be continued .... Also look for future postings titled "The Real DIY Siding"

Monday, July 10, 2006

Oh well ... can you say artesian?


Today was a big day at Boothe Mountain Retreat. We finally got the well guys on site to dig the well. At around $10 a foot with the average well going 250+ feet around us it was going to be an expensive day. We all arrived on site around 9 am and they set up the rig I watched the first 40-50 feet before heading off to work with anticipation of deep dry holes. The guy running the show said that they just finished a job with a 900 ft dry hole (can you say $9,000). They were going to call when they hit water to discuss the flow rate and whether they should keep going. It will usually range from 2-6 gallons per minute.

After a seemingly long day at work and no calls I headed out there around 4:30 to check on the progress. When I got there water was gushing out of the well casing and they were just finishing drilling!!! At around 285 ft they hit water ... and I mean water. It was really coming out. They stopped around 300 ft and pulled the drill. It was the most amazing thing. The well was flowing at 40 - 50 gpm and water was coming out the 300 ft hole without a pump. It is a true artesian well. A while back our neighbor said that when he had his well dug about 20 years ago it did the same thing ... for 10 years. We have enough pressure that we could probably run a 1 inch line to the house with no pump and only use a pressure pump in the house.
I guess if we get the solar water panels set up and have water just coming out of the ground we will be able to take lots of guilt free baths and showers.

Hats off to ACME Well Company!

Thursday, July 06, 2006

The Real DIY Flooring : Part 1

One of the common comments we get about our timber frame project is that it is off the charts regarding the way we are doing it. Some times we take the DIY thing a bit too far. We are about 1/3 the way through installing our Southern Yellow Pine plank flooring using cut nails and I think this is the case with this project. Here is Part 1 of the DIY process for wood flooring.

The flooring process started last September when we had Mr Gentry spend a day clearing a small section of land next to our house. It is the envelope of the next house. In a few hours he was able to do weeks and weeks worth of work that we could do with our chain saw and 1941 Farmall. All the logs were cut into 12-6 lengths and stacked. The trees are about 80 years old with minimal branches until you get to about 50 ft up. At the but end they were between 18 and 24" in diameter.


With the logs in one place we rough cut the flooring in two sizes (1 by 4's and 1 by 6's) to keep the installation a bit more sane. The cutting took several weeks working evenings and weekends. All the flooring was cut with our Lumbermate 2000.


We loaded the green rough boards into the solar kiln and stickered it (1x1 wood strips to help maintain air flow between the boards). This is the second charge for the kiln. The first was the roof decking which was dried down over the winter. It is amazing how fast and well it works. In January it was able to dry air dried (~16% moisture content) to 6-8% in one month. The temperatures were getting up to 120 deg F. This charge took a few weeks to get up to temperature since there was a lot more water to drive off but the temps were getting up to ~140 deg F during the month of June. We were able to take the wood from >30 % moisture content to 6-8% in a month. The kiln has no heat source other than the sun and it uses two attic fans to circulate the air. We are able to load about 1200 to 1400 board feet of wood into the kiln.

At the end of June we off loaded the kiln into the house to acclimate for a week and started to nail down the floor.

To be continued.....


View My Stats